Friday, 16 September 2011

Cherry Cobbler Flowers

Card/Paper: Cherry Cobbler, Very Vanilla

Ink: Cherry Cobbler, Old Olive

Stamps: Vintage Vogue, Cheer and Wishes

Other: Scallpo Trim Border Punch

Card Size: 15cm x 10.5cm (approx 4" x 6")


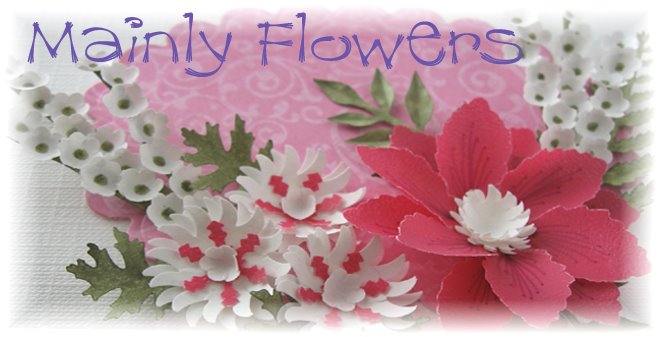
This is a stampers ten make and take that we did a while back. One of my favourite sets, I love the flowers on this set, and the leafy flourish. The flowers were stamped on to scrap, cut out and then given a little shaping before fixing to the card. Below I have shown two options for finishing the centre of the large flower. The first one is more practical for posting, with just a little shaped circle inverted over a blob of pva. The second has stamens made by snipping a strip of card into a fine fringe, then rolling up and spreading the fringing to make a much more dimensional centre.

a little stamping to finish off inside . . .


A couple of days ago, I think I somehow pinched a nerve in my back or hip, and was in a lot of pain, and was having trouble bending, sitting down and standing up. I was very slowly and painfully working my way out of bed a couple of mornings ago, and saying to Amy (8 years old) that I was like an old woman. Her reply: "Well, you're kind of old - you are 50!"

Feeling much better now though. This afternoon I leaned forward whilst sitting at my desk, and felt something go twang - all of a sudden the pain and stiffness was vastly reduced, so guess whatever was pinched is un-pinched now . . . thank goodness!

post signature

Thursday, 15 September 2011

Wedding Gift Thank You Cards


Card/Paper: Whisper White, Elegant Eggplant

Ink: Elegant Eggplant

Stamps: Wedding Sweet, Sweet Swirls

Other: Whisper White Satin Ribbon, Cosmos Orchid glitter, Scallop Trim punch, Curly Label, Cropadile

Card Size: 15cm x 10.5cm (approx 4" x 6")

These are the thank you cards I made for my daughter's wedding. Somewhere between these and the save the date cards I posted the other day, there was some wedding stationery, but I still have to work on getting photos of that!

Fairly simple design because I had to make 50 of them. And I finally found a use for my vacuum cleaner! The glitter is stuck on with pva, and once it had dried and hardened overnight, I used the dusting brush attachment on my vacuum to suck off the remaining traces of loose glitter. Normally I use a soft paintbrush to do the job, but 50 cards was proving to be a bit tedious until I switched to the vacuum. It worked really well, and was ten times quicker. My family didn't even bat an eyelid at mum vacuuming her cards!

post signature

Wednesday, 14 September 2011

Misplaced Mother's Day!


No, I haven't lost the card - it's just misplaced in time whether you're in the UK or US! But I found it in my files, and thought that I would post it anyway. This is the card that I gave my mum on mother's day this year. At the time I made it, it was pretty much all new products from the mini, so I was having fun experimenting with them.

The sentiment stamp is from the SU set Occasional Greetings which is retiring this month.


I decorated the inside to match.

Just a little close-up of the flowers to finish with.

post signature

Tuesday, 13 September 2011

Quick Thinking of You Card


This is one of those rare (for me) cards that comes together unexpectedly, and in very little time!

I saw the idea for colouring with markers onto an acrylic block, spritzing with water, and then stamping onto watercolour paper. I was in the mood for trying it right there and then, so grabbed a couple of colours that I thought might look nice together - Crumb Cake and Marina Mist - to try it out. Beginner's luck helped it to work first time, so I went looking for an image to stamp over the top. This one from Hopeful Thoughts seemed to fit the bill, and the combination makes for a serene feel that suits the sentiment from the set. They are both stamped in Night of Navy.

The card base is Night of Navy, and I just embossed a strip down one side with the Square Lattice embossing folder. Finally added a Crumb Cake mat behind the image before mounting on the card base. A quick bit of stamping on a square of Very Vanilla for the inside of the card, and half an hour after I started it was done! I'm usually a pretty slow card maker when I'm designing, so I was in a slight state of shock at the turn of events!


post signature

Monday, 12 September 2011

Save the Date Card

I do have a picture of the save the date card I made for my daughter's wedding. The patterned paper is a long retired SU speciality paper Bride. It's a self patterned white thick paper, which I brayered Elegant Eggplant onto. The glossier swirls of the design resist the ink, so only the background takes the colour, leaving this lovely effect. Not so sure it was a good idea to brayer 50 invitations x 2 squares of paper though!

The save the date words on the front, and the invitation wording are computer generated and printed onto Whisper White card. The invitation portion simply slides in and out of the case, and both are finished off with matching ribbon - sadly retired as well now, although SU still carries the colour in card and ink.

I was sensible enough though, to research the sizes of envelope available to me, before deciding on the size of the invitation!


post signature

Sunday, 11 September 2011

Thomas

I was browsing through my card photo file, to see what I could put up today, and came across this one that I made back in June for my new son-in-law's birthday. (I like to send grown up cards!)

I googled a colouring page image of Thomas, which I downloaded and took into Photoshop to re-size and print out a few copies. I then cut them into templates to paper piece him with various colours of SU card stock. On most of the pieces I sponged the edges to give them some dimension. All of the pieces were stuck onto a base piece cut from blue card to the outline shape of the engine. I hand drew the face, copying the one on the colouring picture.

I stamped the brown for the sleepers with the retiring Sanded background stamp, and spritzed the ground with the Colour Spritzer tool and a marker. The rails are made from three layers of card stuck together, with a little slit in them where the wheels slot in to hold the card open.

You can see from this back view that the card is an easel card, with a front flap that is shorter and narrower than the back of the card. The greeting is written on the underside.


Friday, 9 September 2011

Big Bold Birthday

Hello!

Well, look at that  . . . I can remember how to use Blogger! Even I was quite shocked when I looked and saw how long since I last posted. Life got in the way one way or another, and blogging took a back seat for a long while, but hopefully I'm back now - although I can't promise every day! I would just like to say thankyou to the people who have sent messages of concern. It was very thoughtful and I really appreciate them. Some of the reasons were not so good, but I'd prefer to talk about one of the good reasons for being absent, which was this in May this year:


My eldest daughter's wedding. Some of you may recognise the youngest bridesmaid - my daughter Amy who does the drawing of names out of the hat for me. My second eldest daughter was chief bridesmaid (second from the right) and my son is third from the right in the back row. Of course that's hubby with me on the right.

I was very busy for a while with all the wedding stationery, which I'll show another day. In fact, at the moment I don't think I have a photo of the invitation, or even one in my posession!

Today I'm showing cards all made with the SU stamp set Big Bold Birthday. It's one of the sets on the Last Chance list (click on the 'Say Goodbye' link above to see the list). Some items are already sold out, and no longer available, and more are going out each day, but at the time of writing this Big Bold Birthday is still available - and at 40% off. There are other items which have also been reduced by up to 40%. Items on the list are only available whilst stocks last, or until the end of this month, whichever comes sooner! So take a look and see if something you love is on there.

Anyway, back to Big Bold Birthday. I'm sad to see this set go. It's such a versatile set, and I have used it many times to create different looks on cards. This first one is nice and glittery and pink! I stamped the frosting part of the cakes with Pretty in Pink ink and then Versamark over the top. I added Heat'n'Stick powder, melted it with my hot air gun and then sprinkled on Dazzling Diamonds. It really twinkles! The cake cases were stamped in Chocolate Chip, cut out and run through the crimper to make them look like real cases. Finally I punched a Real Red card circle for a cherry and covered in in a nice thick blob of Crystal Effects, with a little strip of Chocolate Chip card behind for a stalk. The spotty background was stamped using another stamp from the set. Apart from drying time for the cherries, this was a very quick card, although it sounds like more work. If you click on the image to enlarge it you can see the sparkle better.


Another girly, twinkly card. This time I used the stamp in the set which is intended for a bow on top of a present. If you stamp the image, and then rotate the bow upside down and stamp again, it makes a lovely flower. I stamped these in Versamark onto Pretty in Pink card and then embossed with white embossing powder. I sprayed the card with homemade shimmer spray using isopropyl alchohol and Champagne Shimmer paint. The twinkle just about shows up if you click to enlarge, but it is so much prettier 'in the flesh'. I finished off the flowers by colouring them in with a Versamarker pen to make them darker than the surrounding card. The greeting from the set was stamped four times in Rose Red ink to frame the image, finished off with Rose Red brads and mounted on a Rose Red card base.


 Are you bored yet?! More of the same bow flowers on this card, but instead stamped in Pear Pizzazz and coloured in with Peach Parfait and a blender pen. Finished off with Clear Rhinestone Gems. The 'leaves' surrounding the flowers were stamped with the curly end of the party blower stamp. A little bit of trim made with the Scallop Trim Border punch and the greeting stamped in Peach Parfait to finish off this clean and simple card.


Finally, a stack of presents in a bolder colour scheme suitable for man, woman or child! The card base is Concord Crush, and the two mat layers are Peach Parfait and Pear Pizzazz. The Peach present is a square roughly handcut from the stamped cupcake base image. The green present is a piece of green card stamped with the circle present pattern image and again roughly hand cut. And the Concord present is a punched square stamped with the spotty stamp in Whisper White Craft ink. The bow stamp used to make the flowers above was stamped at the top of the pile in Concord Crush ink, and then using the matching marker and a ruler I drew in the line of string down the stack of presents. This is a really speedy card to make!

Here are some links to previous cards I've made with Big Bold Birthday:

Blue Birthday Balloons
More Birthday Cake
Bright and Cheery Balloons
Big Cake Little Guy

Some more which never got posted on my blog:

Thinking Outside the Box Challenge on ILWS
Inspiration Challenge on ILWS
Limited Supplies Challenge on ILWS
Quick and Simple card on ILWS

And finally, found one more that I made a couple of years ago, and can't see if I posted it or not. I made this for my nephew's birthday, and it also uses my much loved Sanded background stamp which is retiring. It's stamped on the computer generated 16 which I cut out with my Silhouette, and also on the strip of Not Quite Navy at the side. The metallic brads are also retiring. The greeting is an old one from my stash, not part of the Big Bold Birthday set, but the candles are from BBB.

Ok  .  . so you're either sick to death of this stamp set now, or I've convinced you you need it. So talk to your favourite SU demo, about getting one! Or if you don't have one, (or I'm your favourite demo) use the contact me tab above to talk to me!

Maybe the next post should be shorter!

Thanks for visiting,

Monday, 4 October 2010

Ornate Flower and Fancy Flower Punch

The flower on this card was made using the new Fancy Flower punch from Stampin' Up! It was made using the same method as the one in the video in this post, except I only did three layers, and the flower has been left open in the centre. Before spraying the punched shape with water, I inked the edges with Melon Mambo. The pink centre is a shape from the Boho Blossoms punch. The leaves were made from the Fancy Flower punch. I cut each petal apart like pie wedges, then used my paper piercer and mat to score veins, before adding around the flower. The outer points of the leaves are the inner points of the pie wedges.

The flowers stamped at the bottom of the image panel have Dazzling Diamonds around the centres for a little added interest - doesn't show very well, but you can just about see it if you enlarge the image. I used the 2-way glue pen to apply the glitter.


Card/Paper: Melon Mambo, Whisper White, Greenhouse Gala

Ink: Old Olive, Melon Mambo

Stamps: Ornate Flower, Sincere Salutations

Other: Filigree Flower Brad, Old Olive Satin Ribbon, Dazzling Diamonds

Card Size: 5 1/2" x 5 1/2"

post signature

Friday, 1 October 2010

Ornate Flower and Sparkly Snowflakes

I'm quite shocked to see how long it is since I've managed to post to my blog! I knew it had been a while, but even so . . . Hopefully now the busy-ness is behind me, and I can get back to putting up cards regularly. I have a few in the wings, and am starting with the projects for last month's make and takes for my stampers ten members.


This first one has sparkle from the Dazzling Diamonds on the blue flakes, and silvery shine from the Platinum Shimmer Paint I used to ink up the silver snowflakes. Hard to catch it in the photo though - it may show up better if you click to enlarge.

I started by cutting a rectangular mask in a thin piece of card the same size as the image panel. I cut it in the position, and at the angle I wanted so that when I placed the mask over the image panel, the mask covered the whole of the image panel and I wouldn't get any stray ink where it wasn't wanted. I used 2-way glue to temporarily fix the mask to the image panel, then sponged Bashful Blue through the mask, putting more around the edges of the rectangle than in the middle. After removing the mask, I stamped the swirl stamp from Season of Joy three times. I stamped off the image first on scrap paper to lighten it.

The next step was to rub the whole image with an Embossing Buddy, before stamping the blue flakes. SU classic ink is fast drying, which is not suitable for embossing. However, if you ink up your stamp first with Versamark, and then straight to the coloured ink pad - in this case Marina Mist - and then stamp on the card, the Versamark will enable you to add embossing powder to the image. In this case, I used Heat'n'Stick, and when it was melted and hot, sprinkled over the Dazzling Diamonds. This is a very good way of getting the sparkle of glitter on an intricate image like these snowflakes. I did each blue snowflake individually so that the ink didn't dry on the first one, before I had chance to emboss it.

Finished off by applying the shimmer paint to the small snowflake stamp with a sponge dauber and stamping between the blue snowflakes.

Card/Paper: Marina Mist, Whisper White

Ink: Marina Mist, Bashful Blue, Platinum Shimmer Paint, Versamark

Stamps: Serene Snowflakes, Season of Joy

Other: Dazzling Diamonds

Card Size: 15cm x 10.5cm (approx 4" x 6")


This second card uses a stamp set from the new catalogue called Ornate Flowers. I love the shape of this particular stamp from the set. Here I have used my markers to apply three different colours before stamping once to create the image. Simply finished off with a bit of piercing and a little piece of knotted ribbon over the corner before matting onto Cherry Cobbler - one of the gorgeous new colours from Stampin' Up!

The designer paper is Greenhouse Gala, which co-ordinates beautifully with all of the stamps in the Ornate Flowers Stamp set. Just a little bit of piercing and a punched strip of Cherry Cobbler behind to decorate. Used markers again to ink up the greeting in two colours to match the flower. A quick and easy card.

Card/Paper: Pear Pizzazz, Cherry Cobbler, Whisper White, Greenhouse Gala DP

Ink: Pumpkin Pie, Cherry Cobbler, Pear Pizzazz

Stamps: Ornate Flowers, Sincere Salutations

Other: 1/4" Grosgrain Ribbon Pumpkin Pie

Card Size: 15cm x 10.5cm (approx 4" x 6")

post signature

Thursday, 8 July 2010

Buttercups and Daisies


We have plenty of these in our lawn - especially the buttercups. Not much in the way of dandelions though - the rabbits see to that!

This is one of the cards from my most recent class at my local craft shop. One of the ladies was a little worried when she saw all the flowers, but they are really simple to make - the trickiest part is getting them all to stay in place whilst you stick them to the card!

The daisies are just two layers of a Woodware 1" daisy punch stuck together, with a 1/4" circle of yellow crushed velvet card for the centre. After assembling the flower, we sponged a little hint of pink onto the tips of the petals with a sponge dauber.

The buttercups are an EK Success medium Retro Flower punch, with a very finely fringed and rolled strip of card for the centre. The leaves are a Woodware 1" Oak Leaf punch.

The background is stamped in Versamark with a flourish stamp.

I made a little matching tag as well.


post signature

Related Posts Plugin for WordPress, Blogger...