Friday, 29 August 2008
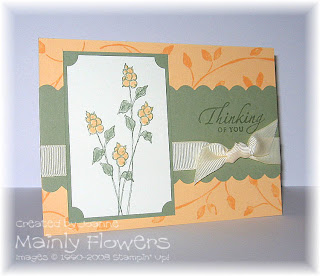
Fanfare Birthday Flower
Here is the tile I used for the fold.
Thank you to everyone who wished me a good holiday! We had a lovely, lazy time - hot, sunny weather, and a fabulous sea view from our villa balcony - about half a mile away down the hill.
Thursday, 28 August 2008
Pink Birthday Flower Line-Up
These flowers were made from two layers of punched daisies, shaped in the same way as my No Tools Flowers. The centres are made from punched sun shapes and a blink blink punched shape - all punches from Woodware. The designer paper is Doodlebug - Shoestrings, and the wording is computer generated - I'm sorry but I can't remember the name of teh font. All on a purchased card blank measuring 13.5 cm by 13.5 cm.
Wednesday, 27 August 2008
Anniversary Birds
The image on this card is from PC Crafter - from the Bird Life 1 set. I used Photoshop to create matching papers and tea bag tiles to finish the card. The wording was also computer generated. I used two folds to decorate the image - one is called the Double Diamond Fold, by Penny and the other is by Rosa and is called the Spring Fold. I don't think that the Spring Fold is available on the internet. The card measures 13.5 cm x 13.5 cm.
Tuesday, 26 August 2008
Sunset Pine
Ingredients:
Card/Paper: Old Olive, Basic Black, Chocolate Chip, Watercolour paper for image
Ink: Versamark, Old Olive, Chocolate Chip, Black
Stamps: Lovely as a Tree, Cheer and Wishes
Other: Black Brads, Mesh strip from stash, clear embossing powder, Stampin' Pastels for background
Card Size: 10.5 cm x 15 cm
Method:
Inked the tree stamp with versamark, and then immediately with Old Olive and Chocolate Chip at the bottom on the trunk. Stamped onto watercolour paper and embossed with clear powder. Chalked the background with various colours of Stampin' Pastels. Mounted onto Chocolate Chip and Black Card with the bottom edges torn. Strip of mesh laid underneath the image. Greeting Stamped in black ink. Added two brads and then mounted onto Old Olive Card. All on a hammered white card base.
Monday, 25 August 2008
Little Plum Butterfly
Ingredients:
Card/Paper: Very Vanilla & Perfect Plum card
Ink: Perfect Plum, Old Olive
Stamps: Touch of Nature & Sincere Salutations
Card Size: 9.5 cm x 9.5 cm
Method:
Stamped the butterfly on vanilla scrap, and cut out. Stamped fern leaves onto vanilla square - first stamping some of the colour off once onto scrap paper to make the image less heavy. Punched the corners with 1/2" circle punch and matted on to plum card. All on a vanilla card base.
Sunday, 24 August 2008
Circle of Roses
Ingredients:
Card/Paper: White Linen Effect card, Computer generated rose background,
Ink: Bravo Burgundy
Stamps: Cheer and Wishes
Other: Green Gems, Yellow Satin Ribbon
Method:
This card was made for a swap where the theme was to use a cut-out tea bag tile for the fold of our choice. I used the basic kite fold, and arranged the folded tiles with the points interlaced in the centre. The tea bag tile is one that I designed in Photoshop, made from an image that was shared on a list I am on. The background paper was made from the same image. I cut a piece of white linen textured card on a slant, and edged it with a corner rounder to make the scallops, and then a Woodware rose design edging punch. Tied round a yellow ribbon from my stash. Stamped with the greeting. The green matting is a colour picked off the leaves in Photoshop and printed on a heavy printer paper and stuck behind the other elements on the card base. Finished with three green gems.
Saturday, 23 August 2008
Those Frogs Again!
Ingredients:
Card/Paper: Pumkin Pie, Old Olive card, Water colour paper for image.
Ink: Versamark Black Onyx, Old Olive, Ruby Red, Ballet Blue, Creamy Caramel, Summer Sun, Pumpkin Pie, Versamark
Stamps: Unfrogettable
Other: Stampin' Pastels for sky and grass - Old Olive, Ballet Blue, Clear Embossing Powder
Method:
Stamped images using black Versamark, using post it notes to stamp extra images to cut out and use for masking. Coloured in with markers and an aqua brush. Chalked in the background with pastels. Matted onto olive card. Corners of image and matting punched with 1/2" circle punch. Base card stamped with mushrooms in Versamark on Pumpkin Pie, and embossed with clear powder.
Friday, 22 August 2008
Saffron Petals
Ingredients:
Card/Paper: So Saffron, Ruby Red, Whisper White card
Ink: So Saffron and Ruby Red
Stamps: Pick a Petal, Sincere Salutations
Method:
Stamped a flower in the corner of the saffron card base, and added the sentiment using saffron ink. Fixed on a square of red card. Stamped spotted petals onto white card with saffron, then overstamped with the doodled petals in red. Stamped the flower centre onto red card and punched out with circle punch. Cut out the flower, and glued flower and centre onto the red card square.
Thursday, 21 August 2008
Apricot Berries
Ingredients:
Card/Paper: Apricot Appeal, Mellow Moss, Very Vanilla card.
Ink: Apricot Appeal, Mellow Moss
Stamps: Oh So Lovely, Sincere Salutations, Watercolour Vine Wheel
Other: 5/8" Very Vanilla Gross Grain Ribbon
Method:
Stamped background image with the wheel onto apricot card base using apricot ink. Edged a strip of moss card with the corner rounder punch and stamped with greeting in moss ink. Tied with a 5/8" vanilla gross grain ribbon. Stamped main image with moss ink onto vanilla card, and coloured in with moss and apricot markers. Punched corners with 1/2" circle punch. Matted onto moss card.
Wednesday, 20 August 2008
Certainly Celery Thankyou Card
Ingredients:
Card/Paper: Whisper White, Certainly Celery card, Certainly Celery Prints Designer Paper
Ink: Certainly Celery
Stamps: Petals Jumbo Wheel, Seeing Spots
Other: 5/8" Certainly Celery Gross Grain Ribbon, Certainly Celery Brad
Method:
I made this card to show how well all the different Stampin' Up elements in the same colour match with each other.
I used the Petals wheel to stamp across the middle of the white card base, and then stuck a strip of designer paper across the bottom. Fixed the ribbon on to the designer paper beforehand. Stamped the wording and single flower on to scraps of white card. Cut out the flower, and used a circle punch to punch out the wording. Mounted both onto a celery punched scalloped circle, and finished with a brad. The medallion is fixed onto the card with foam pads. A really quick card.
Pink Petals
Ingredients:
Card/Paper: Apricot Appeal, Regal Rose, Whisper White, Mellow Moss
Ink: Apricot Appeal, Regal Rose
Stamps: Pick a Petal, Three For You
Other: 1/4" White gross grain ribbon,
Card Size: 13.5 cm x 13.5 cm
Method:
Stamped petals and flower centre onto white card and cut out. Stuck to white card with hand doodling around the edges. Matted onto moss card. Cut a strip of apricot and ran through the Cuttlebug in the Swiss Dots folder. Tied with ribbon. Background was stamped with a flower centre from the Pick a Petal, using rose ink on rose card. Matted onto Moss. All mounted onto white card base and finished with apricot flowers stamped with words from Three for You set and punched using the punch from the same set.
Saturday, 16 August 2008
Big Flower - Little Card
Ingredients:
Card/Paper: Whisper White, Apricot Appeal, Certainly Celery, Certainly Celery designer paper
Ink: Lavender Lace marker, Versamark ink pad
Stamps: Sincere Salutations
Other: Pretties Kit flower, Certainly Celery Brads, Stampin' Pastels, clear embossing pow
Card Size: 9.5 cm x 9.5 cm
Method:
This card is for a colour challenge on In Love With Stamping.
I coloured one of the large flowers from the kit with Lavender Lace pastel, and a sponge dauber - very quick and easy, and gives a slightly velvety look to the petals. For the centre of the flower I punched a 1" circle from Certainly Celery card, and another from Apricot Appeal. Randomly punched 1/16" holes in the apricot circle. I then pressed it into the surface of a Versamark ink pad, and embossed with clear embossing powder. Did this twice to make the embossing a bit thicker. Glued the two circles together, and then into the centre of the flower. Used the corner rounder with the guard taken off to punch a scalloped edge on the apricot card. Used the Stampamajig to postition the wording on the designer paper. Finished off with three brads. All mounted onto a white card base.
Wednesday, 13 August 2008
Show Off Fold
Ingredients:
Card/Paper: Bravo Burgundy from Stampin' Up, plaid, patterned strip & tea bag papers computer designed.
Ink: Bravo Burgundy
Stamps: Cheer & Wishes Stampin' Up
Other: Papermania pearl brad
Card Size: 15cm x 10.5cm
Method:
Haven't made a tea bag card in ages! This one was made for a swap. The fold used is called Show Off Fold by Carole. Has a nice 3d effect. The medallion is mounted on a burgundy Nestability scalloped circle, and is finished with a brad in the centre. The patterned strip is made from a matching tea bag tile design repeated in a line, matted onto the burgundy card. The greeting was inked with a burgundy marker, stamped onto the plaid paper, and again matted onto burgundy card. All on a linen finish card base.
I am also posting the elements that I used in this card, in case anyone would like to use them. Private use only please - no selling of the designs. You are welcome to sell any cards made using them though. The images are a higher quality than I use for my card photos. The tiles will need resizing to whatever size you prefer to work with.
This is the tea bag tile used for the medallion:
The tile I used to make the patterned strip - just printed four in a row:
And the plaid background:
Tuesday, 12 August 2008
Butterfly Wishes
Card/Paper: Perfect Plum, Bordering Blue, water colour paper for image
Ink: Old Olive, Perfect Plum, Bordering Blue, Chocolate Chip, Black ink pad
Stamps: Touch of Nature, Sincere Salutations, Canvas Background
Other: Bashful Blue brads, Ballet Blue Stampin' Pastels
Card Size: 15cm x 10.5cm
Method:
Stamped the branch image three times in black ink, using Stampamajig for accurate positioning. Coloured using an aquabrush and markers scribbled onto the Stampamajig sheet. Stamped the greeting with Perfect Plum, again using the Stampamajig. Chalked the background with Ballet Blue. Used markers to ink the butterfly stamp with Perfect Plum and Old Olive markers, and stamped onto a scrap of watercolour paper. The branch image is matted onto Perfect Plum. Stamped the background with the Canvas stamp inked with Bordering Blue, onto Bordering Blue card. Cut a strip of the same blue, and inked up the end of the branch and stamped twice with the blue, rotating 180' after the first stamping. Stuck the strip across the bottom of the background. Punched three holes with a 1/16" hole punch, and added three brads. Mounted all on to a Perfect Plum card base. The butterfly was cut out, and just the body glued on to the card. Cut a foam pad in half, and stuck one piece underneath each wing close to the body. But I didn't peel off the paper and stick the other side to the page - just used the pads to keep the wings lifted.
Monday, 11 August 2008
Apricot and Celery Card
Card/Paper: Whisper White, Certainly Celery Designer Paper, Apricot Appeal & Certainly Celery card
Ink: Certainly Celery & Apricot Appeal
Stamps: Petals Jumbo Wheel, Sincere Salutations
Other: 5/8" Certainly Celery Gross Grain Ribbon, Three For You punch, 1/2" circle punch, Pretties Kit Pearls
Method:
Stamped with the wheel across the top of the card base using Certainly Celery ink, and then coloured in 'open' parts of the image with Apricot Appeal marker. Wrapped ribbon round top of designer paper and glued both to the bottom of the card. Stamped greeting on white, and then matted onto three alternating layers of celery and apricot card. Used 1/2" circle punch to shape the corners before stacking. Finished with three punched flowers with flat backed pearls. Very quick and easy!
All items used available from Stampin' Up. Designer papers on special offer this month. Click on the Stampin' Up tab below my blog header for details.
Sunday, 10 August 2008
Blue Tit and Damsons
Ingredients:
Card/Paper: Bordering Blue & Perfect Plum. Water colour paper for image.
Ink: Bordering Blue, Perfect Plum,Old Olive, Chocolate Chip, Ballet Blue, Night of Navy, Yo Yo yellow, Close to Cocoa, Black Onyx Versamark, Whispers Black watercolour marker
Stamps: Touch of Nature, Canvas Background
Other: Stampamajig, Aquabrush, Ballet Blue Stampin' Pastels.
Card Size: 9.5 cm x 9.5 cm
Method:
I stamped the images using the black Versamark and Stampamajig for placement. The stamps were lightly stamped off once before stamping the image to get a lighter effect. Coloured the images in using markers scribbled onto the Stampamajig sheet, and the aquabrush. I decided to try the bird as a blue tit, and worked from a photo of a real one to try and get approximately the right colours and markings. I used Ballet Blue and Night of Navy for his back and head. Mixed a little bit of Old Olive on his back to green up the blue a little - you can see that in the enlargement better. For his tummy I used Yo Yo yellow, and mixed with a little blue to make it a greeny yellow. Close to Cocoa for his legs, and the black marker directly on the paper for his head markings, with a little taken back off with the aquabrush to lessen the intensity. The branches were coloured in with Chocolate Chip, Old Olive, and Perfect Plum for the fruit. Chalked a blue sky with the pastels. Matted onto Perfect Plum card. Background stamped with the Canvas Background stamp in Bordering Blue on Bordering Blue card. All mounted onto a Perfect Plum card base.
Thursday, 7 August 2008
Seeing Spots for a Challenge
Ingredients:
Card/Paper: Whisper White, Apricot Appeal
Ink: Apricot Appeal, Only Orange, Brocade Blue
Stamps: Seeing Spots, Birthday Cheer & Wishes, Petals Wheel
Other: 1/2" & 5/8" circle punches
Method:
Used the wheel with apricot ink pad, to stamp the apricot card. Stamped two different circle designs on scraps of white using marker pens in the blue and orange. Punched out and arranged in a random pattern, popping some of them up with foam pads. Inked the greeting stamp with orange and blue markers and stamped directly on the card base.
I made this card for a colour challenge on In Love With Stamping.
Tuesday, 5 August 2008
Elegant Eggplant Flowers
Ingredients:
Card/Paper: Elegant Eggplant, Orchid Opulence, Whisper White card, Certainly Celery Prints Designer Paper
Ink: Certainly Celery, Elegant Eggplant
Stamps: Seeing Spots, Petals Jumbo Wheel, Cheer & Wishes
Other: Scallop Punch, 1 3/8" Circle Punch, Corner Rounder Punch
Method:
Stamped using the wheel directly onto the card base. Punched the edge of the Elegant Eggplant, and Certainly Celery with the corner rounder to make scallops. Layered onto the card base - offsetting the scallops on the two layers. Punched scalloped circles from the Orchid Opulence. Stamped flowers from the Seeing Spots set with Elegant Eggplant ink onto Whisper White. Punched out the images with the circle punch, and glued onto the scalloped circles. Mounted these onto the card with foam pads. Stamped sentiment with Elegant Eggplant.
I made this card for a colour challenge on In Love With Stamping.
Sunday, 3 August 2008
Three Little Unfrogettable Cards
Ingredients:
Card/Paper: Whisper White, Pumpkin Pie, Ballet Blue, Ruby Red, water colour paper.
Ink: Old Olive, Ruby Red, Pumpkin Pie, Ballet Blue, Creamy Caramel, Summer Sun markers, and Stazon ink pad.
Stamps: Unfrogettable
Other: Stampin' Pastels - Ballet Blue and Old Olive.
Card Size: 9.5 x 9.5 cm
Method:
I used post it notes to make masks for some of the images. Stamped the arrangements with black Stazon. Some of the colouring was done by scribbling with the marker onto acetate, and using an aquabrush, and some was done using the markers directly to the paper. The sky and grass were chalked in using Stampin' Pastels and a sponge. Matted onto coloured card, and then onto the white card base. Hand doodling in matching colour of marker using the fine nib end. Click on the images for a closer look.
Saturday, 2 August 2008
Unfrogettable Birthday
Ingredients:
Card/Paper: Old Olive, Really Rust, Summer Sun, Whisper White, water colour paper for images
Ink: Old Olive, Ruby Red, Bordering Blue, Really Rust, Black Stazon
Stamps: Unfrogettable
Other:Cuttlebug, Tiny Bubbles Folder, googly eyes, SU scallop punch, SU 1 3/8" Circle
Method:
Stamped main images onto watercolour paper, coloured in with aquabrush and marker ink scribbled on to acetate. Stamped second set of images and coloured and cut out wings, frogs back legs and snail shell and tail. Punched out main images with circle punch. Punched out scallops from olive, stuck on image circles and glued extra image parts on top. Cuttlebugged yellow strip. Stamped mushrooms and flowers on backing. Used post it to mask left hand mushroom before stamping the one next to it. Used Stampamajig to position greeting. Googly eyes to finish!